Each girl’s wardrobe must have an evening outfit. A dress with an open back, the patterns of which will be discussed below, is the best option for creating a charming romantic image for publication.
The template is the basis of a fashionable outfit
When sewing any clothes, it is necessary to take measurements and transfer them to the drawing. An open back dress is no exception. The patterns of this outfit are quite simple to build, but there are some nuances that should not be overlooked, so that in the end the clothes fit well on the figure.
So, armed with a centimeter tape and a notebook with a pen, the following values should be determined: girth of the neck, chest, waist and hips, chest height, width of the back and shoulder, length of the front and back from shoulder to waist and from waist to hip line.
Building patterns
Further, all the figures obtained must be transferred to the drawing. First, they build a base pattern, and then make model lines that correct the pattern in accordance with a specific model. For the drawing, it is necessary to draw a right angle on a piece of paper, one of the sides should be equal to the circumference of the chest, and the other to the length of the product. After closing this corner into a flat rectangle. As a result of the construction in the figure, half of the back and shelves of the dress will come out. From the upper side you should go down in accordance with the measure "chest height" and draw an additional line (chest area), even lower - the line of the waist and hips. Further, the construction can be divided into separate stages: work with the top of the drawing, with a waist zone and a side cut.
Building a bodice
How to build a dress pattern without experience and basic knowledge regarding the cut of clothes? Yes, very easy! The main thing is to sequentially transfer all values in accordance with the description presented in the article. In the finished rectangle, the neck area for the back is immediately determined on the upper left corner, for the front - on the right.
Further along the chest line from the left vertical mark half the value of the width of the back, from this point they raise the perpendicular. Also, the width of the armhole is laid off from the obtained mark. It is calculated as follows: the semicircle of the chest is divided into 4 and 2 cm is added. All that remains after this segment on the line is the area of the anterior shelf. From the right vertical, it should be noted half the measure “tuck solution”, and from this point raise the perpendicular. The armhole zone is divided in half, and from this point the side seam will drop.
After that, again you need to move to the upper border of the rectangle and mark the width of the shoulder for the back and front in the drawing. At the same time, on the back, the extreme point of the neck should first be raised by 1.5 cm. Also, the shoulder slope is approximately 1 cm bevelled. After these lines are indicated on the side of the shelf from the perpendicular raised from the chest line along the shoulder, 3-4 cm recede a solution of a tuck in the chest, and the shoulder section is extended by the same distance. In the process of sewing, the tuck closes and forms a special bulge of the part for the mammary gland. The first stage of construction can be considered completed.
Designation of drawstring
How to build a dress pattern that perfectly repeats the curves of the body? Of course, make out tuck tucks so that the fabric is adjacent to the body. And that is exactly what includes the second stage. For the calculation, it is necessary to determine the difference in girth of the chest and waist. Excess fabric will need to be closed in tucks in the form of elongated rhombuses 1.5 cm wide each and in side seams no more than 2.5 cm on each side. The top of the tuck can be located at the level of the chest line, and the bottom should not reach the border of the hips by 5-6 cm.
As a rule, there are two tucks in front and on the back and small bevels at the waist on the sides of the product.
Designation of side slices
The pattern of an evening dress with an open back can be narrowed downwards or, conversely, flared. It all depends on the selected fabric for the product and model. In any case, the type of side cut depends on the idea. Another important point is the construction of the seam along the hips. To correctly build the side seam, you should postpone half of the thigh circumference along the line of the hips from the vertical, indicating the middle of the back and the front shelf. It’s not scary if the points go one after another. After the template is cut, it will be possible to glue it and transfer the lines to the drawing. The construction of the base pattern involves straight lines of the side seam from the line of the hips and to the bottom of the product, however, you can immediately make adjustments so that in the process of completion it is not required to paste the pattern several times. Therefore, from the points indicating the boundaries of the semi-girths of the hips, perpendiculars should be lowered to the bottom and the desired width of the bottom of the product should already be marked from them. Usually, the bottom is narrowed by no more than 7 cm. The flare can be of any size. This completes the work with the construction of the side seam.
Dress modeling and fabric selection
A lace dress with an open back of a fitted silhouette just looks gorgeous. For him, no additional work with the drawing is needed. The main pattern can be immediately transferred to the canvas. It is best to determine the neckline on the first fitting, when the dress is perfectly fitted along the waist and chest. Taking the crayon or soap, from the inside, simply draw the desired depth of cut, and then simply cut out the excess material.
A chiffon dress flared down at the side seams will be no less interesting. You can complement this outfit with a thin belt, and the neckline on the back can be decorated with lace.
You will get a dress with an open back, the patterns of which are built very easily.
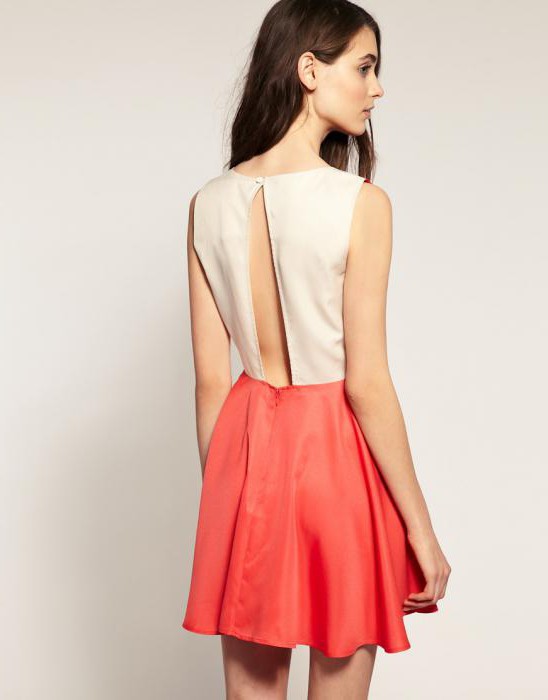
Do not forget that the product can be with a detachable skirt along the waistline. This makes it possible to combine various materials with each other. For example, the top of the product can be made lace, and the bottom can be sewn from silk by cutting out a sun skirt in the shape of a circle. With this combination of materials, an excellent dress with an open back will come out. Patterns of such an outfit in terms of construction differ only in that it is necessary to create a drawing of the top of the product to the waist, and for the skirt to build a pattern of a skirt-sun.