The first photographic prints appeared only at the beginning of the XIX century, and, of course, they were static. The “moving” images, called cinematography, arose only at the end of the 19th century, and developed into diverse branches only in the twentieth. And among the whole variety, a very unusual area of cinema stood out, which was initially called time-lapse (slow-motion) shooting, and years later it borrowed the name "time lapse" from English.
Key Points
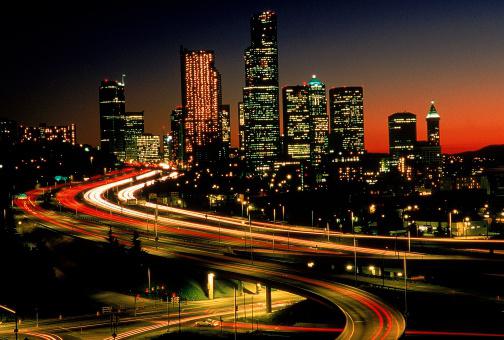
There is not much difference between how Timelapse is shot and how slow motion was made while still using film machines. The basic principle is a reduced frame rate compared to the actual time of the event. That is, what lasts for many hours can be displayed in a few minutes. For example, the opening of a flower, the appearance of a butterfly from a cocoon, sunset or sunrise.
And now a few words about how to shoot Timelapse. Technologically, the process is as follows. A huge number of frames are taken from the same point with the same time interval. For example, the difference between the shots is one second. For many long processes, the gap is much longer. Next, the frames are mounted in a common video sequence showing an event.
Shooting options
How to remove timelapse? There are two ways. One of them is frame-by-frame, still the same time-lapse, during which the equipment simply turns off at the time of a break and waits for a command to resume work. After a certain period of time, it turns on and takes the next shot. The second way of filming Timelapse is regular video recording, which is subsequently broadcast in accelerated mode. It gives good results only if you have initially high-quality equipment, and there is good lighting on the set. Typically, both options are used, but professionals believe that the second is better and more reliable.
Hardware and software that you can’t do without
Before you shoot a time-lapse, you have to get the necessary devices and attend to the necessary programs. In addition to a high-quality camera (preferably a SLR, better still a professional DSLR), a tripod for the camera is a must. Otherwise, you will not provide a constant angle for the lens. You will have to buy a hood (who does not know - this is either an accessory attached to the lens, or a special nozzle on the camera that provides protection against glare and light in difficult or insufficient lighting). Spare batteries (rechargeable batteries) are needed for long-term continuous operation - there is hardly a socket nearby. And for installation - a laptop. If it’s not there, a remote control will do, but if you still need to buy one of them, take a laptop, it’s more functional. For the final mix of the video together, you need Adobe After Effect; if there are several fragments, download Adobe Premiere; Adobe Camera RAW is very useful (it is part of Photoshop).

Choosing a shooting method
Before shooting a time-lapse, you need to evaluate the conditions in which the process will take place, and determine how to properly implement it. On a sunny day and in the absence of a dense shadow from the surrounding skyscrapers, shooting, for example, the running of clouds in the sky or the movement of shadows from the same houses, you can make a video. It would be nice if the camera function included the ability to shoot HD clips. But if shooting takes place in the evening or in the dark, it’s better to do it frame by frame - the video option will obviously be a “bungle”. In this case, you have to accurately calculate the time interval. We proceed from the fact that two hours of “real” need to be laid in 30 seconds. Then the photo should be taken every 9.6 seconds. However, professionals always take samples before filming Timelapse. Maybe a longer period will be needed, maybe a shorter one, so you will have to spend about half an hour on a trial run.
If there is a possibility of video shooting, you need to use it, but remember that in most equipment it takes only half an hour to roll, so do not forget to resume recording.
Required Settings
Before shooting a timelapse, a lens hood is put on the lens, unless, of course, it is built-in. Glare will only spoil the big picture. The tripod is placed as stable as possible: the slightest “subsidence” will make the video unreliable. All extraneous "gadgets" are better to cut down. The camera turns on in Manual Mode. The “white” balance is set manually and is not touched until the end of the shooting. You will have to experiment with ISO: depending on the environment, it ranges between 100 and 1280, but never goes beyond these values. If a significant change in illumination is not expected, the exposure is reset to zero, if you wait for dawn, it is minus 1. To shoot necessarily (strongly, surely!) In RAW. In the future, this will help in working with exposure, noise control and much more.
Secrets and secrets
If you took test shots, looked at them and were satisfied with the result, turn off frame scanning in your device - save quite a lot of energy. It is better to check the displayed settings - and more than once, sometimes mistakes are made purely automatically. The main “jambs": battery charge or forgotten spare batteries (depending on which camera is available); lack of free space in the camera memory or on the card; a separate folder for shooting was not created - many then spend hours searching for the necessary files only because they put everything in a heap and do not know the file names.
How to assemble everything into a single whole
When you have already shot everything that you were going to, only the editing remained. Make sure all parts of your movie are numbered sequentially. For those who do not know this: numbering like “1, 2, 3 ...” will not work, since the file with the number 11 will immediately follow the one that is numbered by one, so the very first one should have a number of at least 01 (or maybe 001 or 0001) - so it will be easier for you to figure out later what to mount for. Remember that in addition to After Effect, which you will “merge” the individual components into the desired final perfection, Photoshop is absolutely necessary. Rather, not he, but his applications, which will appeal to him. On the other hand, you can use any other installation program, there are now an unimaginable amount, so you can choose the one that you like.
Process facilitation
Progress, as you know, does not stand still. And all his new achievements are aimed at facilitating our efforts to achieve a certain result. Including - and easy, affordable creation of high-quality memos. In terms of photo and film history, GoPro has recently come to the aid of amateurs. Nobody has succeeded in facilitating the work of photographers and cameramen so much.
Sometimes it becomes insulting: people sometimes spend years on becoming cameramen, while even a child can shoot time laps on GoPro. Moreover, this camera does not need to be protected from rain, it does not require special muscles for carrying (because it is lightweight) and professional skills and knowledge to use, as it is easy to operate. True, there is a lot of equipment of this class - from 11 and a half thousand (thank God, in rubles) the simplest version to almost 17 thousand in the "advanced" version. With additional bells and whistles, the price will be, perhaps, up to 30 thousand - and in a budget version. But if you want to get a quality time-lapse, is this not an obstacle?