Acquaintance with the fascinating world of radio can begin with the manufacture of simple circuits that will give a good practical experience to a beginner radio amateur. For starters, you can assemble a detector receiver, its manufacture has long been a good tradition among radio amateurs. It is easy to manufacture and can be made in just a few hours. This requires a minimum and affordable set of parts for everyone and, of course, a desire to work. The first experimental detector receiver is different in that you can make changes in it, it does not need to design and manufacture a printed circuit board, it is easy to configure, since all the details fit on the table.
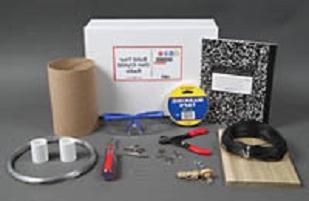
We will prepare the parts necessary for the manufacture of the device. The detector receiver consists of a semiconductor point diode (D9, D2), which will be the detector. A set of capacitors with a capacity of up to several thousand picofarads, a ferrite rod (diameter 7-8 mm) of the brand 400HH, 600HH and a length of 140 mm. You also need to prepare a wire brand PEV-1.2 (0.15-18 mm) and any high-resistance phones with a coil resistance of at least 1500 Ohms. All of these radio components can be bought at a specialty store.

Now let's focus on the manufacture of a coil for a ferrite rod. To do this, wrap several layers of loose paper on the ferrite core and glue them. You should get a dense frame that can be easily removed from the rod. Now we wind three hundred turns of the prepared wire and make bends every five turns. The main mistake of those who make their detector receiver for the first time is that every fifty turns the wire bites off, strips and tins. Leave this operation for later, during the winding process, it is simply enough to make bends and continue to wind the wire. The resulting coil must be glued with paper glue and allowed to dry.
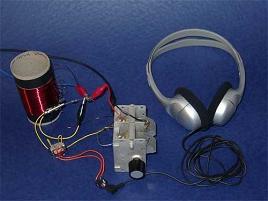
Now we will collect all the details according to a simple scheme. The extreme tap of the coil and the anode of the diode are connected to the receiving antenna. The other extreme tap is connected to the ground and one of the terminals of the headphones. The second output of the headphones is connected to the cathode of the diode. That's it, you built your first radio with your own hands. If all the receiver circuits are assembled correctly, it starts working immediately. We tune the device by changing the number of turns on the coil and select the
capacitance of the capacitor, which is connected in parallel with the headphones. With this we achieve the best sound.
Such a receiver catches well the radio broadcasts of nearby stations operating in the medium and long wavelength ranges. The next step may be the manufacture of one-, two-, and more cascade receivers, which can receive a much larger number of stations. And in the future, it is possible to make a scanning receiver, which automatically finds a station and remembers it. The more complex the circuit of the device, the greater the possibilities inherent in it. But in order to properly configure such a receiver, you need to have good test instruments, a high-frequency generator, an oscilloscope, etc. in your home laboratory.