In every house there are probably many rags, or even finished products, which are a pity to throw away, and there is nothing to do with them. However, now this problem can be solved using various types of patchwork, to which the chenille technique belongs. It allows you to get a new fluffy material from several layers of fabric for the manufacture of various products.
What materials are needed to make a chenille canvas?
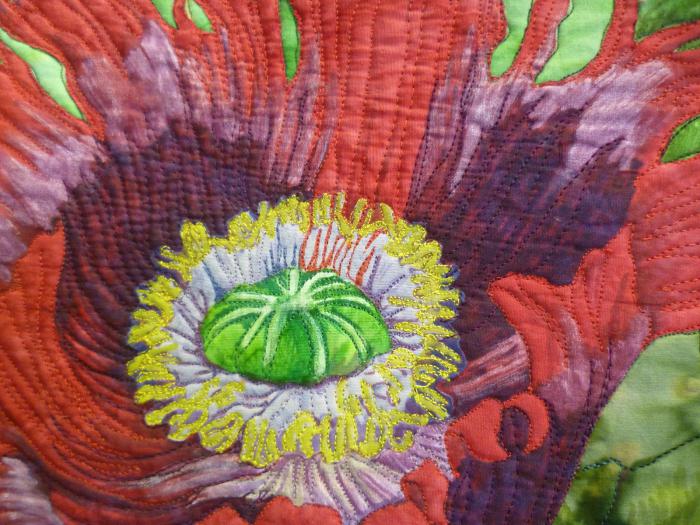
The canvas, for the manufacture of which the chenille technique was used, consists of the upper face layer, middle layers (from 3 to 5), the lower layer - the base. Most often, a fabric is used as the top layer, contrasting the inner layers with a large bright pattern. But it all depends on the preferences of the needlewoman.
Whatever you decide to sew using the chenille technique, first you need to make a fabric. To do this, you will need 5-6 pieces of fabric, you can vary in color and texture, the right size, depending on what will be made of it further. Ideally, when in all layers the directions of the shared filaments coincide , but their perpendicular arrangement is also possible.
In addition, the chenille sewing technique requires a metal ruler, a sharpened pencil, a rug for needlework marked in centimeters, a non-woven base, sewing pins, sharp scissors and a sewing machine.
Preparatory stage
To obtain the chenille fabric, it is necessary to place the non-woven material at an angle of 45 degrees to the marking lines of the rug and, using a sharp pencil, draw lines through each centimeter. The stitch lines should be at a 45-degree angle to the transverse and shared threads. Since the fabric, cut at such an angle, will be beautifully fringe, and not just crumble.
So, the lines are marked, what further does the chenille technique require from the needlewoman? A master class on the manufacture of this material will be needed only for the first time, and then - according to a similar scheme. Each needlewoman will be able to create paintings with a variety of patterns. To continue working, it is necessary to pin all layers of fabric together with pins, and pin the base with lines from the wrong side. All layers are chipped with pins in such a way that they do not disperse and do not interfere with sewing.
Production of a cloth "chenille"
Sewing stitches should be from the center to the edges, regardless of the selected pattern - square, rhombus, spiral, diagonal, straight lines or floral patterns. When all the lines are stitched, the pins should be removed, the non-woven backing should be removed, and all layers of the fabric, with the exception of the lower layer, cut between the lines of the stitches. Further, the chenille technique involves wetting the canvas with water and making movements that simulate hand washing. In the course of this work, fringe will appear. It should be rubbed until it becomes uniform throughout the area. To get the best effect, the product can be tousled with a hard-bristled clothes brush.
Further, the fabric must be dried on a flat surface and can be used for further purposes. The benefit of the chenille technique brings to life the most diverse ideas. The canvas obtained as a result of all the above operations will be very fluffy and soft to the touch. That is why it is often used for the manufacture of sofa cushions, soft toys, rugs and napkins.
Description of the manufacture of toys using the chenille technique
Soft toys are present in almost every home and surround children from a very young age, but adults are sometimes crazy about them, especially if they are beautiful and original. Moreover, some soft toys can play the role of pillows in the nursery or living room. And if these products are also “home-made”, then it will be simply impossible to stop looking at them. It is to such things that chenille toys belong.
Having mastered this type of patchwork sewing on simpler products, any needlewoman can engage in the manufacture of soft toys. Most often, in the chenille technique, bears, cats, bunnies and many other animals are sewn. It is worth noting that they are very original, because they touch and outwardly resemble animal hair. To start making toys using the chenille technique follows from cutting out the details - the head, body, arms, legs, ears. In this case, each detail, both back and front, should be cut from 4-6 types of fabric, which will subsequently be sewn together, and then cut and disheveled as described above, forming a chenille fabric. Next, the back and front parts must be sewn together, filled with padding polyester and assembled together, getting a finished toy.
Chenille pillow - embroidery photo
Cushions are a great way to decorate the interior of any home. And if they are also made in such an unusual technique as chenille, then the effect will be simply stunning. So, to make a pillow using the chenille technique, you need 4 pieces of fabric, 35x35 cm in size. It is ideal that all 4 rags are of different colors, then the finished product will be more original. To make the back side of the pillow, you will need two rectangles, which together would be slightly larger in area than the flap of the front wall of the product.
Zipper will be sewn between these rectangles, through which it will be possible to fill the pillow. In addition, you will need pins, sharp scissors, a stiff clothes brush and, of course, a sewing machine.
First you need to fold all 4 squares of fabric together and decide on the pattern. It can be a diagonal, straight lines, a spiral, a rhombus, a square and many others. Depending on the pattern, it is necessary to chip the fabric with a pin and stitch along this contour. Next, with 4 prepared flaps, you will need to do all the operations that the chenille technique provides: sew the front and back walls and fill the pillow with syntepon or any other suitable material through a zipper sewn in advance.
Pattern for sewing a rug using the chenille technique
The rug is one of many products for the manufacture of which the chenille technique is excellent. A master class describing each step of this work is not required, but a few words about the manufacture of this product is still worth saying. So, since the result should be a dense rug that can be laid in the bedroom near the bed or in the bathroom, it is important to use as many layers as possible, preferably as thick fabrics as possible - the thickness of the rug should be limited only by the capabilities of your sewing cars.
The very first layer that will not be cut should be as dense as possible, and then you can use fabrics of any color and texture, depending on how you planned the appearance of the rug. All layers are sewn together according to the scheme already described above, and then cut with sharp scissors to the base and fringed. The rug can be made original by stitching a rose or some animal on the upper ball, the details of which must be cut from contrasting fabric.
Denim bag made using the chenille technique
In every modern house, there are sure to be several pairs of unnecessary denim pants that have already been rubbed in a certain place, but, nevertheless, the rest of the fabric is still quite suitable for use. So why not sew an original bag out of it using patchwork. Schemes for making a bag using the chenille technique are absolutely not needed, only your imagination is needed, especially at the stage of decorating the product.
So, you should take jeans and cut out from them squares or rectangles of the sizes that you would like to get a bag. 3-4 flaps of fabric will be needed on each side of the product. It is worth noting that all the features of the manufacture of the chenille fabric described above apply to jeans fabric to the same extent . When both parts of the bag are ready, you will need to sew them together, insert the zipper, sew on the handles and decorate at your discretion. For this purpose, you can even use embroideries and appliqués, which are often present on the pockets of the same denim pants.
Chenille Tack
Potholder is another thing necessary in the house, or rather in the kitchen. The more they are, the better, because in the kitchen there are a lot of hot pots, cups, pans and other utensils, which must always be somehow moved and put somewhere, avoiding damage to furniture, tablecloths and oilcloths.
The good news is that for the manufacture of tacking does not require a lot of fabric, and it does not have to be any special, any of its options are suitable, which is no longer suitable for the manufacture of many other things. It is also worth noting that for sewing a tack you do not need too many layers - 3 will be quite enough, otherwise it will be inconvenient to use. For a more aesthetic appearance, the first layer - the base of the tack, should be turned inside out to the subsequent layers, and upon completion of the production of the fabric using the chenille technique, trim the product and sew the edges with a contrasting fabric or braid, not forgetting to sew a hanging loop.
Patchwork: composition building
The chenille technique is far from the only variety of patchwork. There are many other species that deserve no less attention. Thanks to various combinations of shapes, colors and textures of fabric flaps as a result, you can get a real work of art. Starting work with pieces of fabric follows from determining the size and geometric shape of the future product. The simplest is a pattern consisting of individual motifs, the edges of which are limited by the border. The main thing is to maintain a balance between the design and the background.
When constructing any composition, special attention should be paid to the center. The center of ornaments made according to a certain pattern must be distinguished with a rag of contrasting color or with a large pattern. Free application allows the selection of the center in both size and color. In order to get a beautiful patchwork, dark and larger figures should be at the bottom of the composition, and at the top - small and light.
Patchwork patterns: chess patterns
The articles look very original, for the manufacture of which chess quilting was used. The schemes in this case can be used very different.
So, for example, the simplest is the alternate stitching of squares of two types of fabric into strips, and then strips into a canvas, turning each second strip upside down to form a checkerboard pattern.
You can also get a chess pattern by using a diagonal pattern. However, in this case, it is better to use fabrics of 4 different colors. First you need to stitch together several strips of different colors, then cut them into strips across, and they, in turn, place them diagonally, shifting one square, and stitch together.
As you can see, there are a huge number of ways to use seemingly unnecessary scraps of fabric, so do not rush to throw out worn out or already out of fashion clothes, because you can breathe new life into them.