Beautiful crocheted pot holders will decorate any kitchen, make the interior of the room more comfortable and bright. Making such products with your own hands is not difficult at all. All that is required is to prepare yarn, a hook, and most importantly, stock up on a good mood.
In this article, we will share with you two excellent workshops on making round and square tacks. They are intended for beginner needlewomen. Getting to work.
Knit crochet tacks: a simple master class
In order to make this practical and interesting product, you will need a hook number 4,5 and yarn of any color. It is advisable to choose thick knitting threads with a minimum content of synthetic fibers. We suggest that you make a beautiful square-shaped hold-in pouch with a size of 17 cm. Let's start work with air loops, they need to be done 10 pcs. Next, we knit crochet tacks according to the scheme.
We skip two loops and perform one single crochet (art. B / n) in the third. We knit another seven tbsp. non-cash We complete the row, turn the product over. The second row we begin to perform with one air loop. We continue knitting with crochets. Important: we carry out all the elements behind the back wall of Art. non-cash previous row. Having created a sufficient number of rows, you will see that you have formed a pattern called "gum".
We continue to draw up a tack-cover
By analogy with the first two, we make another sixteen rows. You get a long strip. Fold it in half, connect and tie the edges on three sides with single crochet. For registration, you can take a thread contrasting in color: this way your product will look more elegant and bright. On the bend line in the center we make a loop from a chain of air loops. We draw the fourth side with a "crustacean step" or tie it with a "shell". As a result, you should get a square napkin cover with a convenient hole in which you can put the hot handle of the pan. That's all, a comfortable, practical and smart tack is ready.
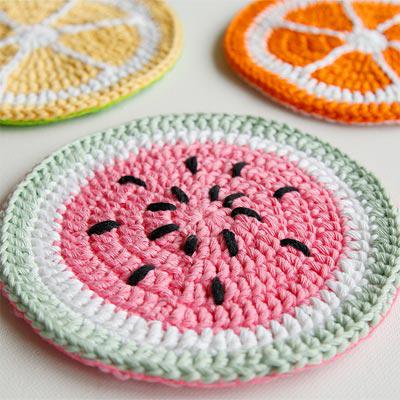
We make a round kitchen potholder
For the manufacture of round tacks, you can choose any knitting thread, preferably dense and durable. It is desirable that the color of the yarn is in harmony with the decoration of the kitchen. Also, for knitting, purchase a suitable size hook, for example No. 3,5. We will tell further how to make round crocheted kitchen potholders. Schemes for their implementation may be different. For beginner needlewomen, we advise you to adopt the following simple technique.
We collect 5 air loops (VP), form a ring from them, knitting a connecting half-column. For lifting, we will make two VPs, and then we will knit 12
double crochets (SN) in a ring. We close the row with a connecting loop, and the second - start with two VPs. Next, we knit crochet tacks, performing 1 CH in one, and then 2 CH in another loop. According to this scheme, we work until the end of the row and end it with a connecting half-column.
Crochet: oven mitts
In the third row, we continue to make increases, knitting first two CHs in different loops, and then again two CHs, but already in one loop. The fourth row is performed by making three double crochet, and then two single crochet stitches. We continue knitting, constantly performing the necessary increases. Thus, we create only seven rows, and we knit the eighth with columns without a crochet. So you should get a circle.
Now, by analogy, we make the second one the same. Then we will fasten together the two parts obtained together and make a strapping of columns without a crochet. That's all, you got a solid double round tack. We recommend taking a thread of contrasting color for strapping, this will make the product more interesting and attractive. Also do not forget to make a loop so that your tack is convenient to hang. Attach a chain of air loops to the potholder and tie in single crochet columns. Now you know that crocheted kitchen potholders are quite easy to arrange on your own. Even a novice master can very well create several such accessories, having spent a little time and effort.