The situation when you need to get rid of any inscription present in the picture arises quite often. For example, you may need to remove the company logo from the advertisement, or even just the date from a photo taken by yourself. You can erase an unnecessary detail using almost any of the existing graphic editors. So, how to remove captions from the picture?
Paint Editor
In the event that the inscription is located on a plain background, you can remove it using the Paint editor. This program is available on any home computer running Windows. In order to open it, you need to click the "Start" - "All Programs" button, and then go to the "Standard" item.
How to remove an inscription from a picture in Paint?
So, you have found the application and opened it. What next? And then open our picture by going to the main menu and clicking on the “Open” item. Select the desired image in the folder in which it is located.
You can remove the inscription in Paint by simply copying part of the background and putting a patch on it. To do this, click on the triangle under the item "Select". In the menu that appears, select the Rectangular Area tool. Next, place the cursor converted to a cross on the part of the figure where there is a background free from the image. Then hold down the mouse button (left) and select a small rectangular area. We place the cursor in the formed rectangle, press the mouse button (right) and select the “Copy” item in the menu that appears.
Now click anywhere in the picture and again click on the right button. In the window, select the line “Insert”. Now let's see how to remove the inscriptions from the picture. To do this, drag the resulting patch onto the text by clicking on it and holding the mouse button (left). Most likely, she will not completely block the inscription. Therefore, it will need to be stretched. To do this, place the cursor in the corner of the patch. As a result, it is converted into a diagonally directed arrow. Hold the mouse button (left) and drag the patch to the side, up or down until it grows to the required size. We adjust its position so that the inscription is completely closed.
Photoshop Editor
The Photoshop photo editor is by far the most popular of all applications designed for working with images. The widest possibilities of this program are used by both professionals (artists, photographers, etc.) and amateurs. The editor is not free. However, working with it is much more convenient than with most such programs. With its help, you can remove unnecessary text not only from a single-color, but also from a background non-uniform in texture.
Photoshop® CS5 Graphics Editor
To get started, let's look at how to remove the inscription from the image in Photoshop CS5. The way to get rid of unnecessary parts of the picture in this version is slightly different from that used in earlier versions of the program. It is slightly lighter and takes less time. We will talk about how to get rid of the inscription in earlier versions below.
How to remove the label in Photoshop® CS5?
Open the purchased program and click on the “File” - “Open” buttons. We select the photo requiring adjustment. In order to work with the inscription was more convenient, it is worth increasing it. This can be done using the Magnifier tool.
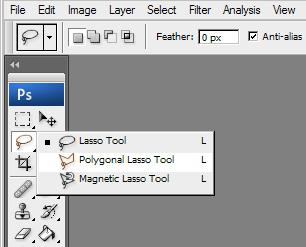
Now let's see how to remove the inscriptions from the picture. To do this, in the navigator, take the Lasso or Rectangle Selection tool and select the text. Next, on the control panel, go to the “Editing” tab and select the line “Fill” in the menu that appears. After that, the "Fill" dialog box will be displayed. Here, in the "Use" area, select the item "Based on the content." In the "Overlay" area, we apply the following settings: opacity - 100%, mode - normal. Now click on the OK button. As a result of all these manipulations, the selected area will be filled with the background.
Remove Labels in Photoshop® CS6
Let's consider how to remove an inscription from a picture in "Photoshop CS 6". This is done exactly the same as in Photoshop® CS5. We also open our picture by going through the items “File” - “Open”. Then again copy the Background layer and increase the unnecessary text box. After that, go to the "Editing" - "Fill" section and make the necessary settings in the dialog box that appears.
How to remove labels in other versions of the Photoshop editor using the Stamp tool
In earlier versions of the program, you can remove unwanted parts from the image using the Stamp tool. This work is very simple, but it requires a certain amount of accuracy. The Background layer in this case also needs to be copied.
So, how to remove captions from the picture with the “Stamp” tool? To begin, increase it with the tool “Magnifier”. Take the “Stamp” and place the cursor on a free area of the background somewhere close to it. Hold down the Alt key and click on the selected area. In this case, the cursor circle will decrease in size, and a cross will appear inside it. Next, move it to the inscription. Having released the Alt key, click on it. As a result, part of the background is copied over the inscription. Step by step, fill in the entire area to be adjusted. You may have to click on the background with the Alt key pressed more than once. In this case, the final result will look much more accurate.
How to remove the inscription in the program "Photoshop" by cloning?
The cloning method in the Photoshop editor is similar to the method that we examined at the very beginning for the Paint program. The inscription is removed using the Lasso or Rectangular Area tool. All that is required is to select the portion of the background that will serve as the patch. Using the Rectangular Area tool, simply stretch the square in the desired area. With the help of "Lasso" you can make more complex selections. The resulting patch must be copied to a new layer. To do this, using the Lasso or Rectangular Region tools, click on the selected area with the mouse button (right) and select the line “Copy to new layer” in the pop-up window. A new patch will appear in the layers window. In the working field, it will not be highlighted.
Next, you need to take the “Move” tool (black arrow) and drag the patch (being on the layer with it) onto the text. In the event that it does not completely overlap it, go to the “Editing” tab - “Free Transformation”. After that, holding the mouse button (left) on one of the squares on the transformation path, you need to stretch the patch to the required size. Then it should be moved so that it is on top of the text, which in this case is located a layer below. This can be done without leaving the transformation field. After the text is closed, press Enter. Thus, instead of the inscription in the picture, only a piece of the background merging with the environment will be visible.
At the very last stage, you will need to merge all the layers into one. To do this, click the mouse button (right) anywhere in the picture and select “Merge Layers” from the menu that appears. As a result, there will be one Background with the inscription already removed.
So, you most likely now understand how to remove the inscription from the picture. "Photoshop" and other graphics programs allow you to perform this operation in just a few clicks. In Paint, this can be done by highlighting the patch, copying and closing the text with it. The same technique, along with the method of painting with the Stamp tool, can also be used in the Photoshop editor of earlier versions. In Photoshop, starting with CS5, uninstallation is even easier — automatically, using the Content-Based Fill tool.