Java is an application that ensures the normal operation of all system components and elements in a browser written in the programming language of the same name. In other words, this is a very important program. That is why users are advised to monitor the release of its new versions and be updated in a timely manner. This article will discuss how to upgrade Java to the latest version. Two simple ways will be described.
Java Upgrade Methods
The most interesting thing is that the program itself must notify the user of new versions and offer to install. But this is provided that the program is already installed on the computer and the corresponding option is enabled in it. If for some reason these conditions are not yet met, the article will tell you how to fix it. Well, having finished with the preface, we will go directly to the methods of updating Java.
Method 1: Download the latest version from the developer's site
If you decide to upgrade Java 7 to the latest eighth version, then do it first of all, it is recommended on the official website of the developer. Only there you will be sure of the authenticity of the software, because on third-party resources, attackers can modify the program code by placing viruses in it.
- Open the official website of the program in the browser.
- Click on the "Download Java for Free" button.
- Confirm your actions by agreeing to the terms of the license agreement and clicking the button to start the download.
- After the download of the installer to the computer is completed, run it with administrator rights.
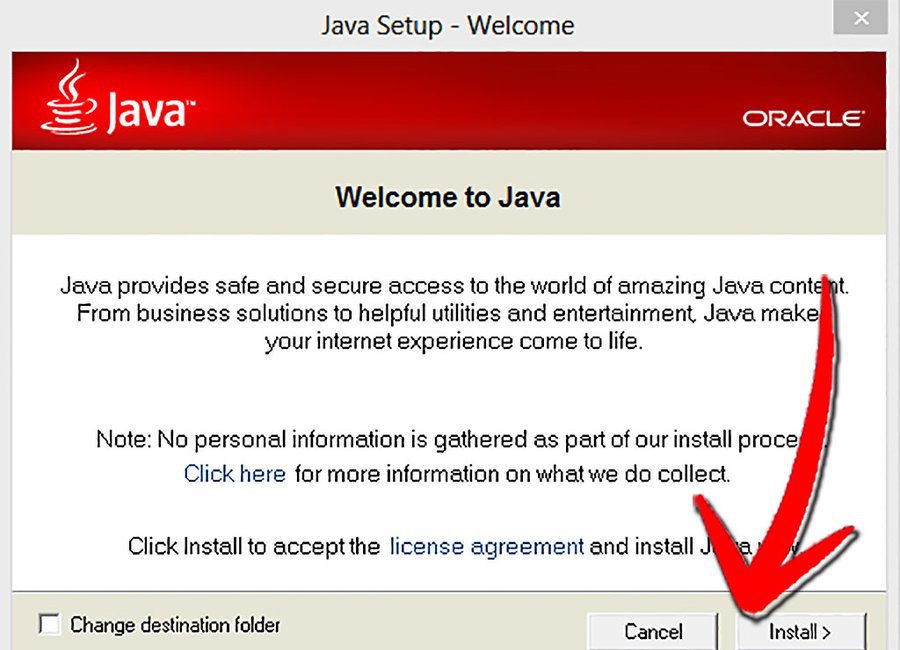
- In the welcome window, you will be given the opportunity to select the folder for installing all the application files. If you want to do this, before clicking the Install button, check the box next to Change destination folder.
- If you checked, then the next step will be directly selecting the directory for installation. You can leave it by default, otherwise click the Change button to open the Explorer window.
- In it, select the desired folder and click on the "Select" button.
- The process of unpacking all program components will start. After a while, if other versions of the program are installed on the computer, a window appears in which you need to check all detected software with checkmarks and click the Uninstall button to remove it. This will ensure more stable operation of the installed version.
- After filling the status bar with a green bar, the last window of the installer will appear, in which it will be said that the installation was successful. Click the Close button to close it.
This was the first way to update Java, but as mentioned earlier, there is also a second, so we’ll immediately move on to it.
Method 2: Java Control Panel
The Java Control Panel is a program in which you can set parameters for the Java application itself. Accordingly, it is installed as an additional component, so if Java was not installed on the PC, then it will not be. Well, for those who are okay with this, now instructions will be provided on how to update Java.
- Go to the "Control Panel".
- Choose from a list of Java items.
- In the window that opens, go to the Update tab.
- Click the Update Now button.
If you did not use the latest version of the program, the process of downloading and installing the update will begin; otherwise, a window will appear with a notification about the lack of new versions.
Also pay attention to the Check for Updates Automatically item, which is located in the program window. If you put a checkmark next to it, the program will automatically check for new versions in the future and install them, so it is recommended to check the box and click the Apply button.
Conclusion
As a result, you learned two ways to update Java on your computer. They are significantly different from each other, but as a result you will get the same effect - updating the program to the latest current version.