Few users know what coockie files are and why they are needed at all. In this article, we will try to give an answer to this question, but among other things, we will tell you how to enable coockies in Yandex and how to configure them in it.
What are these files
It is wise to understand their very concept before proceeding to the instructions for enabling and configuring coockies. And we will try to do this in simple language, so that everyone can understand what is at stake.
So, coockies or in common people "cookies" are service files with small data collected by browsers and stored on a computer. They are used only for one thing - to accelerate the work of frequently used services. The most commonplace example is auto-complete registration forms. Once you visit the site, and the browser will remember all the actions that you performed on it, and save important data, and in subsequent times this site will work faster.
Having dealt with the definition, you can go directly to how to enable cookies in Yandex.
We turn on cookies in Yandex
If you are thinking about how to enable cookies in Yandex, then this is quite simple, especially when we have provided detailed instructions below:
- Launch a web browser.
- Open the menu by clicking the button with three horizontal lines located in the upper right corner.
- In the context menu, select "Settings".
- In the tab of the same name that opens, scroll to the bottom.
- Click "Show advanced settings."
- Among the sections, find "Personal Information".
- Click the "Content Settings" button.
- Check the box next to "Allow".
- Click the Finish button.
Just like that, you can enable cookies in Yandex. How to configure them will be described later in the text.
Customize coockies
We have already figured out how to enable cookies in Yandex - this is not difficult, fortunately, their settings are just as simple, especially since it includes not so many parameters, some of which do not affect anything at all. So, you might notice in the last dialog box, exactly where you checked “Allow”, there are some more buttons, such as “Manage exceptions” and “Show coockie”. It’s about them that we’ll talk now, but first you should pay a few words to the “Block data” mark. Accordingly, if you check the box next to this item, the browser will not accept coockie files from suspicious sites, which will significantly increase security. But the problem is that the browser itself decides which site is safe and which is not.
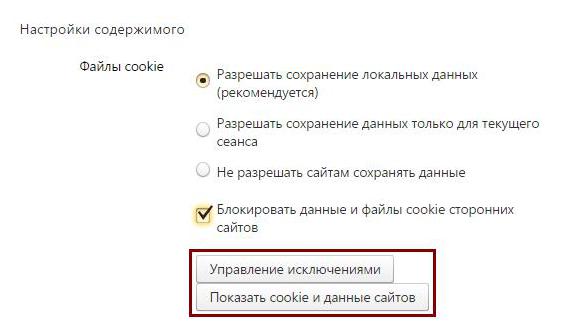
Well, now let's click the "Manage Exceptions" button to go to the settings interface for this parameter. There you can set an exception for sites. For example, you turned off coockie completely, but on one site you would like these files to be collected. To do this, you need to enter the site domain in a special form and select "Allow" from the drop-down list. We hope that the principle of using this parameter is clear to you.
Let's look at the "Show coockie" button. Click on it to go to the desired dialog box. In it, you will be presented with a list of sites from which the browser has already collected data. All you can do is delete unnecessary ones.
Now you know how to enable cookies in Yandex and how to configure them. We hope you find this article helpful.