If you decide to change something in your home and change the standard doors to more modern ones with a sliding mechanism, you will probably be interested in installing the sliding doors with your own hands, since it is much cheaper to cope with such a simple job yourself than to call a master. First you need to get acquainted with all the features and advantages of such structures in order to get a good understanding of the principle of work and do everything as efficiently as possible.
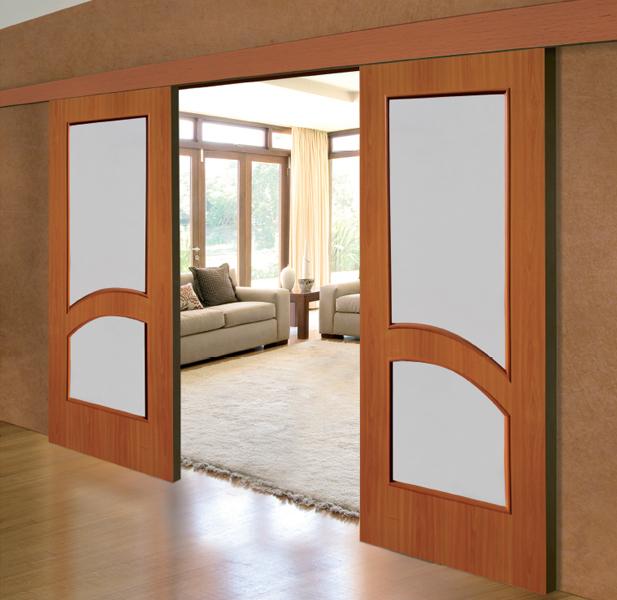
How is the installation of compartment doors? Before embarking on the installation, you need to find out whether such a design is suitable for you, as well as to deal with its device. The basic design includes rollers, guides and web. Parts are attached to the canvas from the bottom. Limiters are installed on each side. Thanks to this arrangement, the door rises and has the ability to move without obstacles. Models that were made a number of years ago and are now considered obsolete include another video. The complete set included also floor rails. To date, compartment doors are extremely popular. Why did this happen?
Benefits
If you compare the interior sliding mechanism with the usual, you can not help but notice a lot of advantages. Do-it-yourself coupe door installation is quite simple, if you follow the instructions. When using them, you can save some space and remove the "blind zone", which is reserved for the plowing of conventional structures. Also, such doors are relatively inexpensive, there is a huge assortment on the market from which you can choose the most suitable option. The design does not differ in a complex device. In addition, many models look very organic and stylish in a modern interior.
The only drawback that sliding systems have is the low level of sound insulation. If you are ready for the fact that the sound will penetrate into the room, or at your place quite quietly and calmly, you can safely take up the installation.
Preparation for work
First of all, get ready for the upcoming work. You must have everything you need. This canvas, platbands, slats, whetstone (cross section 5 mm), accessories and false panels. It is important to remember that you need to leave a gap between the door and the platbands. Otherwise, they will cling to movement. In addition to materials, you will need some tools.
Necessary tools
To work, you need to stock up on the following tools: self-tapping screws, mounting foam, screwdriver, “feather” drill, plumb, level, wooden wedges and tape measure. To install a wooden canvas will not be enough to mount it on the rails. First of all, we must take into account the height and width. To calculate the size of the doors, you need to measure the opening and add 5 centimeters to the result. When calculating the length of the guide, you need to multiply the width by two. After completing the preparation, you can proceed directly to the installation.
Rail Installation
So, we proceed to the installation of compartment doors. A step-by-step instruction consists of the following steps. First of all, you need to make an opening. Slopes need to be formalized by aligning them. Next, plaster them or paint (you can paste the wallpaper). But it is better to give preference to a wooden box. Give it a horizontal position and assemble it, and if the planks are not in size, carefully align them. Install the box in the opening, fix it using special struts. Be sure to check the position with a level. After the initial installation of the panels, you can begin to mount the guide.
To do this, it is necessary to saw off the bar of the desired length, which will exactly match the length of the guides. Use self-tapping screws to connect the guide to the end that is below. Fasten the structure to your desired height using the level. Consider the direction the door will open, and position the middle of the strip so that it falls in the middle of the opening. After mounting the guides, the web is hung. How to do this, consider below.
How to hang the canvas?
When collecting the canvas, make sure once again that you have correctly measured the opening. This stage of work involves mounting the rollers and attaching the door to the guide. First, use the “pen” to make one hole at each edge of the end. These holes will be needed to install the rollers. Screw 2 metal bases with screws. Insert the rollers into the holes. Guide the latter so that they are under the rails. Screw the rollers in accordance with the height. Lift the door leaf, placing it under the guide, and set it vertically. Make sure the wheels are parallel. They should be easy to ride on a rail. After setting all levels, fill the gaps with mounting foam. When all the joints and cracks are closed, you need to start assembling the accessories.
Installation of stoppers and gaskets
How do you do the installation of compartment doors with your own hands? A step-by-step instruction includes the following steps. Before installing the components and attaching the seal, begin to install the stoppers. Lock the door leaf, set the limit. Use for this level. Move the limiter on both edges of the rail and screw it into the block. Attach plugs to each side.
The next step is to attach the flag clip. Attach it so that it can be inserted into the groove of the lower end. Moving, the roller will damp lateral vibrations. Then proceed to install the handle. Sliding mechanisms must crash into the canvas. First, make a hole in a wooden canvas to fit the size of the future handle, attach the base and carefully place the pad.
After mounting the handles, we take up the platbands. The choice is yours - you can glue them or nail them with nails (it is advisable to take the latter without a hat). The same manipulations must be carried out with a false panel, which will close the beam over the rail.
And the last thing you need to do is to cover the future door with a sealant. After completing this work, the installation is formally completed. Thus, the installation of a do-it-yourself interior door will be successfully completed without involving a master. On average, work takes one day.
Installation of compartment doors in the dressing room - instructions
Consider another case. How to install do-it-yourself wardrobe doors? This process can also be dealt with without assistance. Thanks to the sliding system, you can easily divide even a small space between the room and the wardrobe. Thus, the interior will look very stylish. Blind areas, which are usually reserved for opening the door, will now be released for more practical use. All the things in the dressing room will be at hand, and there will be much more space in the room.
To start installing the system, you need to carefully measure the niche or opening of the wardrobe where you plan to assemble them. After measurement, the door is made to order. If you do not want to pay extra money and use the services of an assembly wizard, you can try to mount the structure in the dressing room yourself. In order to do this, you will need to mount the upper and lower tracks, install the canvas, adjust it after installation and set each stopper.
How to mount the upper and lower track?
The upper and lower tracks are horizontal guides that serve to move from side to side of the canvas. Accordingly, the upper track is mounted to the upper part, using the extreme line of the opening, which is located in front. Next, tightly and securely screw it to the surface of the opening or wardrobe. A similar track is mounted at the bottom of the door. In this case, you need to take into account the indent from the markup of a previously installed track. If you chose a one-sided door with an asymmetric profile, you need 18 mm, and for a two-sided door with a symmetrical one - 9 mm.
Before installing the floor track, it is necessary to mount the stoppers. The lower part is screwed with screws to the bottom of the wardrobe, and if the opening is not wooden, but a ceramic floor, double-sided tape should be used. It is advisable to choose a quality one. These include products of the company ZM. However, you need to be careful so as not to run into a fake.
After completing the installation of tracks you need to start installing the canvas. How to do it? Bring the canvas into the groove of the upper track, and then, lifting the canvas, press the lower rollers with your fingers so that they fit tightly into the door. Please note that there are springs inside. Bring the door to the groove of the floor track. Release the rollers and carefully guide them into the groove.
Adjustment after installation
After mounting the door, you need to carefully adjust it. Use the adjusting screw that you should find in the lower recess of the side profile. It is important not to confuse this recess with another hole that is adjacent and used to hold the frame together. Tighten the screw by pushing or lowering the lower rollers to the desired level. The door is adjusted until it fits snugly in the side of the cabinet vertically, being closed.
After adjusting the design, you need to glue the end brushes. They stick to the edge of the side profiles and help to soften the movement of the canvas from one side to the other. Each door by the same analogy needs to be configured separately.
End of installation
Having glued the door profiles with brushes, we set the stoppers. What is their function? They help to avoid opening the door yourself if your house has a slope or the floor is curved enough. Use a screwdriver or key to slide the stopper into the groove and set it so that the roller does not move and is firmly locked. Thus, the installation of the compartment door in the dressing room will be completed. Next, you can start using the design. Also in our article there is a photo of the installation of a door-coupe do it yourself. Thanks to them, everyone can see the installation process clearly.
Conclusion
Do-it-yourself installation can be done even by a beginner. To do this, you just need to carefully read the instructions, prepare all the necessary components and tools, have patience and carefully follow all the steps step by step. If it seems to you that you can’t do this job, you can use the services of masters who, for an additional fee (about 2 thousand rubles), will perform a quality installation.